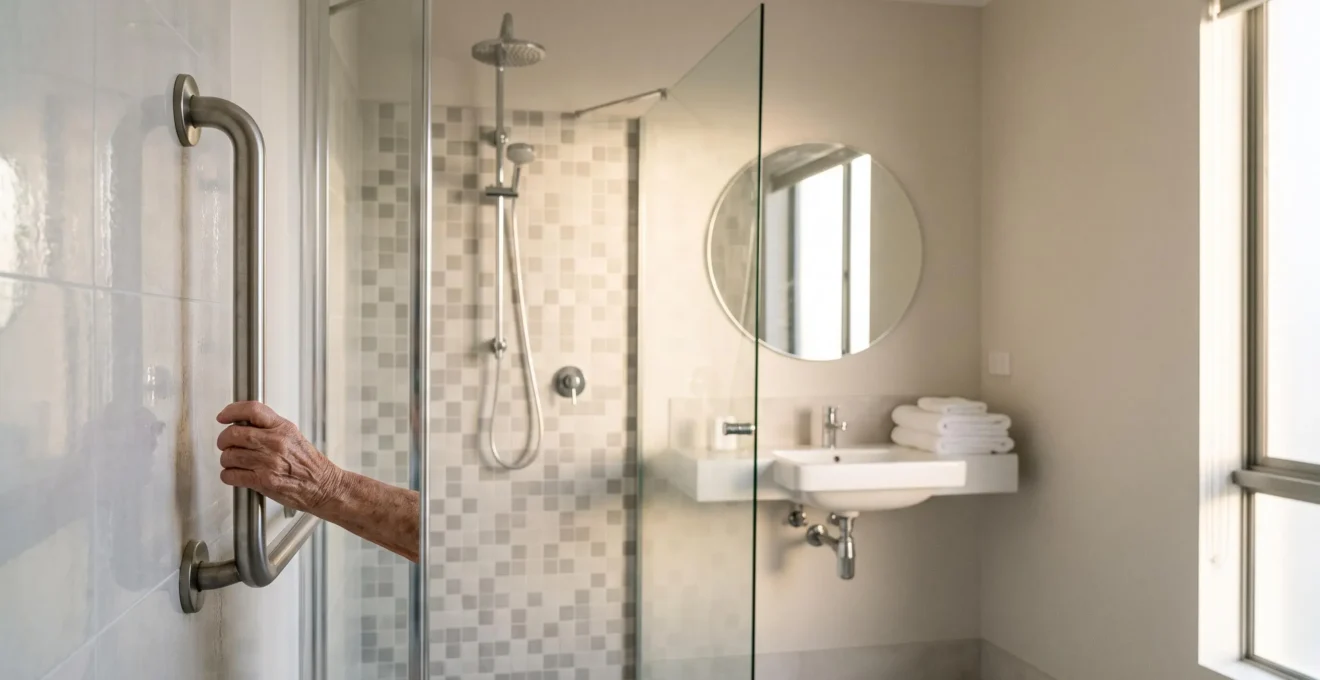
A fall is rarely an accident; it’s a predictable breakdown in balance during specific movements, and a correctly placed grab bar is the tool designed to intervene at that exact moment.
- The combination of wet surfaces, tight spaces, and complex motions (sitting, standing, turning) makes the bathroom the most common site for serious falls.
- A grab bar’s effectiveness depends entirely on its placement and mounting. Its position must correspond to the ergonomic force required during a “point of transition,” and it must be anchored to a wall stud.
Recommendation: Stop seeing grab bars as generic safety handles. Instead, analyze your bathroom routine to identify your personal points of instability and install a structurally sound bar precisely where it can interrupt the choreography of a potential fall.
The thought of a fall is frightening, and for good reason. It represents a sudden loss of control, independence, and well-being. When we think about home safety, our minds often jump to the obvious: a wet floor. But this view is dangerously incomplete. The stark reality is that the bathroom, a space of personal care and privacy, is statistically the most hazardous room in the home for anyone over 65. The conventional wisdom to “just be careful” fails to address the underlying mechanics of why these falls occur with such alarming frequency.
As a fall prevention specialist with a background in occupational therapy, I see this issue differently. The problem isn’t just a slippery tile; it’s the unique combination of environmental hazards and the complex sequence of movements we perform in a confined space. A fall isn’t random. It has a predictable choreography—a series of events where our center of gravity is compromised. The key to prevention, therefore, isn’t just a vague sense of caution. It’s understanding this choreography and installing a simple, powerful tool to interrupt it: the grab bar.
But if the wrong type of bar is chosen, or if it’s placed incorrectly, it provides a false sense of security that can be even more dangerous than having no bar at all. This guide moves beyond the basics. We will deconstruct the specific risks in your bathroom, explain the ergonomics of where and why a grab bar must be placed to be effective, and clarify the critical difference between a decorative fixture and a life-saving device. We’ll explore how to choose the right type, integrate it beautifully into your decor, and even navigate the options for funding and installation.
This article provides a structured path to turning your bathroom from a high-risk area into a space of secure independence. The following sections break down exactly what you need to know to make informed, practical decisions that genuinely protect you or your loved ones.
Summary: Why a simple bar is the key to preventing bathroom falls
- What Makes Your Bathroom the Most Dangerous Room in Your Home After 65?
- Where Exactly Should Grab Bars Go to Actually Prevent Falls Rather Than Just Look Safe?
- Suction Cups, Wall-Mounted, or Floor-to-Ceiling Poles: Which Grab Bar Actually Holds Your Weight?
- How to Add Safety Rails Without Making Your Bathroom Look Like a Hospital Ward?
- Who Pays for Bathroom Safety Modifications and How Do You Get Them Properly Installed?
- How to Fall-Proof Your Home Without Making It Look Like a Hospital Ward?
- How to Walk Through Your Home and Spot Every Fall Risk Before It Hurts You?
- Which 5 Things in Your Home Are Most Likely to Send You to A&E This Year?
What Makes Your Bathroom the Most Dangerous Room in Your Home After 65?
The statistics are stark and consistent. According to the CDC, nearly 80% of home-related accidents among seniors happen in the bathroom. This isn’t a coincidence or simply bad luck. It’s a result of a perfect storm of risk factors converging in one small space. While wet floors are a contributor, the primary danger lies in the physical demands of the bathroom routine itself. These are the “points of transition”—moments where you are required to shift your weight, lower or raise your body, and change direction, all while your balance is most vulnerable.
Think about the sequence of movements: stepping over a tub wall, sitting down on or standing up from a low toilet, or pivoting on one foot to dry off. Each of these actions temporarily compromises your center of gravity. As we age, factors like lower body weakness, reduced mobility, and subtle shifts in balance make these transitions significantly more difficult to manage safely. A hard, unforgiving surface is just inches away, turning a minor slip or moment of dizziness into a catastrophic event. It is this combination of dynamic movement and environmental hazards that defines the room’s risk profile.
The true danger of the bathroom, as this image suggests, is that it feels familiar and safe. Yet, it is precisely this familiarity that can lead to a lapse in vigilance. The room’s design inherently prioritizes water containment and hygiene over mobility support. Without dedicated stability aids, you are relying solely on your own strength and balance during the most challenging moments of your daily routine. This is why proactive modification isn’t an admission of frailty; it’s a smart, logical response to a well-documented and predictable risk.
Where Exactly Should Grab Bars Go to Actually Prevent Falls Rather Than Just Look Safe?
A grab bar installed in the wrong place is little more than a wall ornament. Its purpose is not for decoration, but for intervention. To be effective, its placement must be dictated by the ergonomics of force—it must be positioned exactly where your body needs to push, pull, or stabilize itself during a point of transition. The first step is to choreograph your own routine: walk through the process of using the toilet, shower, and tub, and consciously note every single moment you reach for a wall or sink for support. These are your critical intervention points.
The orientation of the bar must match the movement it is designed to assist. A vertical bar facilitates a pulling motion, ideal for helping you stand up from a seated position. A horizontal bar provides lateral support for steadying yourself while standing or moving along a wall. An angled bar offers a combination of both, often used for exiting a tub where you need to both pull up and shift your weight sideways. The goal is to create a seamless “scaffold of support” that mirrors your natural movements.
The following table, based on common ergonomic principles, breaks down how a bar’s orientation directly serves a specific physical movement. As you review it, think about your own bathroom and the forces you exert during your routine. This information is crucial for ensuring a grab bar provides real, functional safety, as highlighted by guidelines on combining style and safety.
| Bar Orientation | Primary Function (Ergonomics of Force) | Recommended Placement |
|---|---|---|
| Vertical | Pulling motion when standing up from the tub or toilet | Near the tub rim, roughly 8-10 inches from the rim |
| Horizontal | Lateral support while standing or moving in the shower | Higher on the wall, about 33-36 inches from the base of the tub |
| Angled | Combined push/pull motion for benches or exiting a tub | Diagonal placement where a shower bench or tub wall meets the adjacent wall |
Ultimately, the perfect placement is personal. While standards provide an excellent starting point, the final position should feel natural and intuitive for the person who will be using it. The bar should be exactly where their hand instinctively reaches in a moment of instability.
Suction Cups, Wall-Mounted, or Floor-to-Ceiling Poles: Which Grab Bar Actually Holds Your Weight?
Let me be unequivocal as a falls prevention specialist: suction cup grab bars are not safe for supporting body weight. They provide a dangerously false sense of security. While they may feel firm upon initial application, their grip can fail without warning due to changes in temperature, humidity, or microscopic imperfections on the tile surface. They are, at best, a light steadying aid, but they must never be trusted in a slip or fall scenario where your full body weight is applied suddenly. A real grab bar is not a gadget; it is a piece of structural safety equipment.
The only truly safe option is a bar that is physically and permanently mounted into the wall’s underlying structure. This means screwing it directly into wall studs—the vertical wood beams that make up your home’s frame. A grab bar is only as strong as its anchor points. When properly installed into studs, a high-quality grab bar can support hundreds of pounds of force, far exceeding what is required during a fall. This is the non-negotiable standard for safety. Floor-to-ceiling poles can also be an excellent solution, especially in areas where wall mounting is difficult, as they use tension to create a secure vertical support.
This image perfectly illustrates the difference between temporary adhesion and structural integrity. The suction cup relies on a fragile vacuum, while the bolted steel bar becomes an integrated part of the wall itself. According to Americans with Disabilities Act (ADA) standards, compliant grab bars must be installed at a height of 33-36 inches from the floor and have a space of 1.5 inches between the bar and the wall to ensure a secure grip. These specifications are designed for one purpose: to ensure the bar will be there and will hold when you need it most.
How to Add Safety Rails Without Making Your Bathroom Look Like a Hospital Ward?
A common hesitation in installing grab bars is the fear that they will make a home look sterile and institutional. This is an outdated perception. Today, safety and style are not mutually exclusive. The key is to approach grab bars as an element of intentional design rather than a medical afterthought. By choosing the right finish, style, and placement, safety features can blend seamlessly into your bathroom’s decor or even enhance it.
Start by selecting materials that match your existing fixtures. High-quality, rustproof stainless steel is a durable and timeless choice, but bars are now available in a wide range of finishes, including brushed nickel, oil-rubbed bronze, and matte black. Many brands now offer decorative series where the grab bar is cleverly integrated into the design of a toilet paper holder, a towel rack, or a corner shelf. This “dual-purpose” design provides support exactly where it’s needed without adding visual clutter.
More important than the hardware, however, is the conversation. Making these changes is a collaborative process built on dignity and respect, not a unilateral decision. The person who will use the bars must be involved in choosing their location, height, and style. When approached as a shared goal of maintaining independence and comfort, the process becomes an act of caring, not a concession to age. A horizontal bar beside the toilet and a vertical one just above it can provide crucial support for sitting and standing, all while looking like a coordinated part of the room’s design.
Who Pays for Bathroom Safety Modifications and How Do You Get Them Properly Installed?
Once you’ve decided on the need for grab bars, the practical questions of cost and installation arise. The funding landscape can be complex, as coverage varies significantly between different insurance providers and government programs. It’s a common misconception that standard Medicare will automatically pay for items like grab bars. In most cases, it won’t, but there are important exceptions and alternative avenues for financial assistance.
Original Medicare (Parts A and B) generally classifies grab bars as “convenience items” rather than “Durable Medical Equipment” (DME), and therefore does not cover them. However, some Medicare Advantage (Part C) plans offer supplemental benefits that may include an allowance for home safety devices. Medicaid programs, which are state-specific, are often more likely to cover such modifications for eligible low-income individuals. For veterans, VA grants like the Home Improvements and Structural Alterations (HISA) grant are a key resource and can cover a wide range of bathroom safety upgrades. The key is to be proactive and contact your specific plan administrator or local VA office to inquire about your eligibility.
This comparative table breaks down the typical coverage scenarios, but remember that these are general guidelines. You must verify the details of your own plan, as shown in this analysis of Medicare coverage for bathroom safety.
| Funding Source | Typical Coverage for Grab Bars | Key Condition |
|---|---|---|
| Original Medicare (Parts A & B) | Generally not covered; classified as a convenience item | Rarely covers grab bars unless bundled with qualifying DME |
| Medicare Advantage (Part C) | Sometimes covered via over-the-counter or home safety benefits | Varies significantly by individual plan |
| Medicaid | More likely to cover bathroom safety equipment for low-income beneficiaries | Coverage rules vary by state |
| VA Grants (HISA, SAH, SHA) | Can cover grab bars, walk-in tubs, and other bathroom modifications | Must be a qualifying veteran contacting a local VA office |
After securing the hardware, the final critical step is installation. While a DIY approach is possible for those with experience, it requires careful assessment of the wall structure. If you are at all uncertain, hiring a professional is an investment in safety, not an extra cost.
Your Pre-Installation Wall Assessment Checklist
- Identify the wall type: Drywall, tile, or concrete each require different anchors and drill bits. A stud finder is an essential first tool.
- Locate the studs: Confirm the precise location of the wooden studs that will serve as the structural anchor for the bar. This is non-negotiable for safety.
- Select the right hardware: If mounting into drywall without a stud (not recommended for high-load areas), confirm you have heavy-duty toggle or molly bolts rated for at least 250 pounds.
- Prepare for the surface: For tile, use a new, diamond-tipped drill bit and masking tape over the drill site to prevent the bit from slipping and cracking the tile. For concrete, a hammer drill is required.
- Assess your confidence: If any of these steps feel uncertain, stop. Treat hiring a qualified handyman or contractor as the final, crucial step in ensuring the grab bar will function as a life-saving device.
How to Fall-Proof Your Home Without Making It Look Like a Hospital Ward?
While the bathroom is the epicenter of fall risk, a comprehensive safety strategy extends to the entire home. The goal is to create an environment that is inherently safe without sacrificing comfort or personal style. Many of the most effective modifications are subtle or even invisible, working in the background to reduce risk. It’s about making smart, small changes that have a big impact on daily safety.
The first principle is creating clear and unobstructed pathways. This means systematically decluttering walkways, removing trip hazards like loose cords, and ensuring frequently used items are within easy reach to prevent over-stretching or climbing. Lighting is another critical element. Instead of relying on a single, harsh overhead light, use a layered approach. Add nightlights to create a gentle, illuminated path from the bedroom to the bathroom. For stairs, which are another high-risk area, simply marking the edge of each step with a strip of high-contrast tape can dramatically improve visibility and prevent a misstep.
Perhaps the most common culprit in home falls is the throw rug. While they add color and comfort, unsecured rugs on a smooth floor are a major tripping hazard. The solution isn’t necessarily to live with bare floors; it’s to either replace them with rugs that have a built-in, non-slip backing or to secure existing rugs firmly with double-sided carpet tape. The impact of a full home assessment cannot be overstated; research has shown a home safety assessment led by an occupational therapist can reduce fall rates by as much as 38%. This professional insight can identify risks you may have overlooked and provide tailored, practical solutions.
How to Walk Through Your Home and Spot Every Fall Risk Before It Hurts You?
Becoming proactive about fall prevention means learning to see your home through a new lens—a “risk-assessment” lens. What was once familiar furniture and decor can suddenly appear as a potential hazard. The best way to do this is to conduct a systematic walkthrough of your home, room by room, with the specific goal of identifying and mitigating fall risks. This is something you can do yourself or with a family member.
The Centers for Disease Control and Prevention (CDC) provides a straightforward framework for this process. As you move through your home, focus on four key areas: floors, stairs, lighting, and, of course, the bathroom. This isn’t about finding fault; it’s about identifying opportunities for simple fixes that can prevent a serious injury. Keep a notepad and write down every issue you find, then create a simple action plan to address each one.
Your home safety walkthrough should include these essential checks:
- Floors: Look for any objects you might have to walk around. Are there stacks of books or magazines on the floor? Are there loose electrical or phone cords crossing pathways? Check that all carpets and rugs are smooth and firmly secured to the floor.
- Stairs and Steps: Check that there are sturdy, secure handrails on both sides of every staircase. Ensure the steps are not broken or uneven. Can you clearly see the edges of the steps?
- Lighting: As you enter each room and hallway, check if there is enough light to see everything clearly. Are the light switches easy to find and access, even in the dark? Are there any dark areas, especially along the path to the bathroom?
- Bathroom: Confirm that you have non-slip surfaces in the tub or shower. Check for the presence of securely mounted grab bars near the toilet and inside the shower or tub area, positioned to assist with sitting, standing, and stepping in and out.
By performing this simple audit regularly, you transform your role from a potential victim of an accident to the active manager of your own safety. It’s an empowering process that puts you in control.
Key takeaways
- A bathroom fall is not a random accident but a predictable event, occurring at “points of transition” where balance is compromised.
- A grab bar’s effectiveness is determined by its ergonomics: its placement and orientation must match the specific push/pull movement it needs to support.
- Structural integrity is non-negotiable. Only professionally wall-mounted bars anchored to studs provide real safety; suction cups offer a dangerous illusion of security.
Which 5 Things in Your Home Are Most Likely to Send You to A&E This Year?
While a comprehensive home safety plan is ideal, prioritizing the most common hazards can have the biggest immediate impact. From an occupational therapy perspective, we see the same handful of culprits responsible for the majority of serious home-related falls. By identifying and addressing these top five risks, you can significantly reduce the likelihood of an emergency room visit for yourself or a family member. These are often seemingly benign items that we overlook in our day-to-day lives.
The most frequent offenders lurking in plain sight are:
- Unsecured Throw Rugs: Small rugs that slide on wood or tile floors, or larger carpets that bunch up, are the number one cause of tripping. In fact, CDC data shows an estimated 37,991 adults aged 65 and older are treated in emergency departments each year for falls associated with carpets and rugs.
- Clutter on the Floor: Objects left in walkways—from a pair of shoes to a stack of mail—force you to alter your natural gait, increasing the risk of a misstep. Clear pathways are safe pathways.
- Inadequate Lighting: Dimly lit hallways, stairwells, and rooms make it difficult to spot hazards. This is especially dangerous at night when navigating the path to the bathroom.
- Loose Cords and Wires: Electrical and phone cords stretched across a room create a direct and often unseen tripwire. They should always be secured along baseboards or under furniture.
- Pets Underfoot: A beloved pet can unfortunately become a mobile tripping hazard, especially small animals that are hard to see or that dart unexpectedly into your path. Being mindful of their presence is crucial.
Addressing these five areas is a powerful first step. It requires a conscious shift in habit—like putting things away immediately and managing cords—but these small efforts pay enormous dividends in personal safety and peace of mind.
By systematically addressing these risks, you are not just “fall-proofing” your home; you are redesigning it for continued independence and confidence. The next logical step is to conduct your own home safety audit and create a prioritized plan to implement these changes.